Play Online Rummy Game

Play Online Rummy Game
Win Cash Prizes

Search This Blog

Thursday, August 30, 2012

About Photoshop Art History Brush Tool

ART HISTORY BRUSH TOOL(SHIFT + Y):

In this tutorial we are going to have a look at Art History Brush Tool.

This tool allows us to paint with some effective strokes by using a source data from a snapshot or a specific history state.

Simply this tool creates an artistic or paint effect.

1.  First open an image. Go to File menu and click on open option or simply press CTRL + O and browse image from your hard drives and press ok. Here I took a flower.


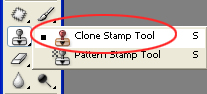
2.  Select Art History Brush Tool from Tools Panel or simply press SHIFT + Y in keyboard.


3.  Then select brush type (brush tip) from Brush Preset Picker. This step is very important while working with Art History Brush Tool. We need to select correct Brush tip (brush type) that suits to the image which we have chosen.


NOTE:  you can also adjust brush sizes using keyboard short cuts. Press " ] " (right bracket) to increase brush size or press " [ " (left bracket) to decrease brush size.

Here I selected "Dry Brush Tip Light Flow Brush"(66).

4.  Then we need to change some values in Brushes Palette which is present at top right of the window. These changes are very important in creating an artistic or painting effect. First click and then select "Shape Dynamics" and change the value of Roundness jitter. Here I entered its value 50%.


5.  Now we have to change the value of "Hue jitter Position" in Brushes Palette. Here I entered its value 10%.


Hue means Shade or Color. If we change this value means a few various colors (RGB) will be painted on the image according to given values.

6.  Then we have to focus on options bar. Set all values as shown in the picture. Set all these values default except Area. Set this value to 25.


7.  Now go to Layer Palette and unlock the Background layer. To do this just  double click on the Background layer and press ok to unlock Background layer.


8.  Now we have to make some changes or adjustments to the image to take a Snapshot of that state. Here I want to make my image with more vibrant colors. To do this go to Image menu and go to Adjustments and click on "Hue/saturation".


9.  Now adjust values of your choice. Here I set Saturation value to 25 to make my image with vibrant colors.


10.  Then click on the "Create New Snapshot" icon in the History Palette to take a snapshot of the color changed state of the image (saturation version).

You can observe New snapshot(snapshot 1) in the picture below.


11.  Now click on small square box just left to the New Snapshot (snapshot 1) to define a "Source". Defining Source means the adjustments or changes which were made to create a Snapshot will be applied directly to the original image while working with Art History Brush Tool.Here I defined New Snapshot (snapshot 1) as my source.


12.  After defining the "Source", click or drag ( according to need) over the image (here flower in my case) to make that image artistic or a naturally painted image.

13.  Now look at the final outcome.


PLEASE LEAVE YOUR COMMENTS   

Tuesday, August 28, 2012

About Photoshop History Brush Tool 2 With History Palette options

There are some other options which are associated with History Palette box. we will learn about these options with a little practical work.

If you can't find History palette, just press " F8 " in keyboard.

Practical explanation about these options:

1.  First open an image from your hard drives. Here I took an image with oranges.


2.  Now convert this colored image to Black and White by pressing CTRL + SHIFT + U as we did earlier. Now this action (desaturation or black and white) will be recorded and displayed in History Palette box.


3.  If we select History Brush Tool and drag over the image, the original color of the image will be restored (since the last action is desaturation). But here, I restored only the original color of top orange.


4.  Now we will deal with "Snap Shot" option in History Palette.

This Snap Shot option allows us to take a temporary Snap Shot of a particular state of an image. Here I want to create a New Snap Shot of a state which contains Top orange color restored. To do this click on the "Create New Snapshot" option in History Palette. Follow the image.


The main use of Snap shot is that we can compare subsequent changes to the Snap Shot state easily.

This can also be used as the "SOURCE" for History Brush Tool to restore this snap shot's state.

5.  Here Two Snap shots are present in my image means we have Two Sources. One source (original) with all oranges in color and other source (snapshot 1) with Top orange in Color and other oranges in Black and White.


6.  Now I selected History Brush Tool and dragged over the bottom orange to restore the original color.


7.  But I changed my mind and I wanted to restore the original state of snapshot 1 (Top orange in color and other two are in black and white).

8.  To do this we need to click on the small square box left to the snapshot 1 to use that snap shot as a "source" to restore that state using History Brush Tool. Then select History Brush Tool and drag over the bottom orange.

Now the original state of snapshot 1 (Top orange with color and the other two in Black and White) will be restored.


Hence History Brush Tool uses "Source" option as the reference and restores that state.

That's all about Snap shot and Source options in History Palette. The other options Create new document and Delete options are very easy to understand.


Create New Document From Current State: This option is similar to Snap shot option. But the selected image state becomes a New Photoshop Document.

Delete: This will remove the selected image state along with all the actions done under that image state.


PLEASE LEAVE YOUR COMMENTS 

About Photoshop History Brush Tool 1

HISTORY BRUSH TOOL(Y):

In this tutorial we will learn about one of the most interesting tools in Photoshop, History Brush Tool.

As the name denotes History Brush Tool restores the original state of an image.

In Photoshop every command or action which we do on the image will be recorded,named and displayed in History palette.

Using History Brush Tool we can restore any previous state.

To understand clearly follow the steps:

1.  First open an image. Go to File Menu and click on Open option or simply press CTRL + O. Then browse image from your hard drives and press ok. Here I took an image with oranges.


2.  Now perform any action on the image like erasing, copying, cut or painting with brush etc. Here I want to erase an orange. To do this select Eraser from Tools Panel or simply press " E " in key board. Now press and hold mouse left button and click near the orange and drag over the orange to erase.


While erasing, each erasing action will be named, recorded and displayed in History palette. you can observe those in the above image.

3.  Now select History Brush Tool from Tools Panel or simply press " Y " in keyboard.


4.  You can increase brush size by pressing " ] " (right bracket) or decrease brush size by pressing " [ " (left bracket)

5.  Now click and hold mouse left button and drag over the place at which orange was present earlier. You will observe that the erased orange replaces or restored.


Like this any action or command will be restored with History Brush Tool.

Now we have to Know the most popular use of History Brush Tool.That is converting colored image to black and white and then restoring a particular original color back (making black and color).

1.  Open an image from your hard drives. Here I took an image with a Horse.


2.  Now we have to convert this colored image to Black and white. To do this go to Image Menu at the top and go to ADJUSTMENTS option. Then click on DESATURATE option or simply press  CTRL + SHIFT + U.


Now colored image converted to Black and White.


3.  Then select History Brush Tool from Tools Panel or simply press " Y " in keyboard. Now select brush size from Brush presets or press " ] " to increase or press " [ " to decrease brush size.


4.  Now I want to restore the Horse color back.

Then hold down CTRL + SPACEBAR and click on the image to zoom in and hold down spacebar and click on the image to move the image around the work space while working.

5.  Now by adjusting brush sizes, press and hold mouse left button and carefully drag over the image (horse in my case) to which you want to restore the color.

6.  Now look at the final image.


For extended information see the next post About Photoshop History Brush Tool 2 with History Palette.


PLEASE LEAVE YOUR COMMENTS

Monday, August 27, 2012

About Photoshop Clone Stamp Tool

CLONE STAMP TOOL (S):

This time we shall deal with Clone Stamp Tool.

The Clone Stamp Tool and Healing Brush Tool are always confusing Photoshop users. They seem to be work similarly, but they have distinct differences.

Clone Stamp Tool samples pixel from one area on which we click and clones this area on to another area.

It covers an area with the sampled area. But Healing Brush Tools blend or combine sampled area with another area.

To practice this tool follow the steps.

1.  First open an image. Go to file menu and click on open Option or press CTRL + O. Then browse image from your hard drives and press ok.


2.  Now select Clone Stamp Tool from Tools Panel or simply press "S" in keyboard.


3.  After selecting Clone Stamp Tool, you will find some options in options bar.

(A)  Brush presets: From Brush Preset Picker, you can select your desired brush with desired diameter.


NOTE:  You can increase brush size by pressing " ] " (right bracket) or you can decrease brush size by pressing " [ " (left bracket). but these short cuts changes only brush size but not the brush hardnees.


(B)  OPACITY: If you decrease opacity value, Clone Stamp Tool clones more transparent copy. If you increase opacity value, Clone Stamp Tool clones less transparent copy. This means Clone Stamp tool copies original color. so opacity controls the amount or intensity of the color. Hence use 100% opacity value.

(C)  FLOW: Flow controls the rate at which the color flows from your tool or brush.

(D)  ALIGNED: If we check this option, the image which we are cloning will be drawn continuously even if we release mouse button while drawing.

If this option is unchecked means, we need to make "a Sampling Point" each time when we release mouse button and draw the image again.

NOTE:  All these options with default values will give better result (don't change these options unless you need)

4.  Now add a New layer. To do this go to Layer Palette and click on New Layer Icon. Now we will have to do all our work on this New layer. because if we work directly on the image, there is a chance of making our original image worst.

Because we are working with two layers, we have to check an option "Sample All Layers" in options bar.


If we work with Clone Stamp Tool without checking this option, we will get nothing, because we are working on new layer which contains nothing. If we check this option means we are allowing Photoshop to sample from all visible layers.

5.  Now hold down "ALT" key. when cursor turns to a target symbol press mouse left button in the image to set "a sampling Point".


6.  Then click and drag over the image which you want to cover with the sampled image.
Now you will observe that the image on which you are dragging will be covered with the
sampled image.


While you are drawing on the image, a "+" symbol appears and moves on the sampled image indicating that it is cloning area from the part on which it is moving.

NOTE:  Hold down CTRL + SPACEBAR and click mouse left button on the image to work with zoom in mode to cover edges of the image clearly.

Hold down spacebar and click on the image to move the image around the workspace.

Now we need to adjust brush sizes with short cuts said earlier and do single clicks around the edges to cover edges clearly with the sampled image. After the completion of cloning, hold down ALT + SPACEBAR and click on the image to zoom out.

7.  Now we have successfully cloned image over another image with Clone Stamp Tool.

Look at the result.


We can also use some "Blend Modes" in options bar before cloning. This Blend Modes affect the layer (on which we are working) by blend in(combines or matches) with the layers beneath it.

Here I showed some images which are cloned with some Blend Modes.


PLEASE LEAVE YOUR COMMENTS  

Sunday, August 26, 2012

About Photoshop Red Eye Tool


RED EYE TOOL (SHIFT + J):

Sometimes we are happened to observe images with “Red eyes”.

Actually Red eye happens when camera’s flash light reflects off the animal or person’s retina.
Removing Red eye is the simplest task in all of Photoshop tasks.

1.  First open am image which contains a person with Red eye(s). Here I took an image with a single Red eye.


2.  Then select RED EYE TOOL from Tools Panel. Right click or hold down mouse left button on Spot Healing Brush Tool. A drop down menu will appear. Now go down and select Red Eye Tool (last one).


3.  In the options bar, you will find “PUPIL SIZE and DARKEN AMOUNT” options which are set to 50%. This value is the ideal one.


NOTE:  If we want to see the Red eye clearly, we have to work with zoom in mode. To do this, hold down CTRL +SPACE BAR and click on the image to zoom in. Now hold down space bar and click on the image to move the image around the work space.

Hold down ALT + SPACE BAR and click on the image to zoom out.

4.  Now click only once in the Red area of the eyes.


5.  Now look at the image, Red color of the eye is naturally removed.


NOTE:  If the correction doesn’t match the size of PUPIL or amount of darkness, press and hold CTRL + ALT and then “z” to undo and change PUPIL size and darkness amounts according to need and click again in red color of eyes.

PLEASE LEAVE YOUR COMMENTS